
Avoid These Projector Installation Errors
We'll also discuss the role of AV system integration software in streamlining the installation process and minimizing errors.

Installing a projector may seem like a straightforward task, but there are many potential pitfalls that can lead to suboptimal performance or even damage to your equipment. Whether you're setting up a projector for a home theater, office meeting room, classroom, or video wall, it's crucial to avoid common installation errors. Proper projector installation ensures the best possible image quality, reduces the risk of technical issues, and prolongs the life of your device. In this comprehensive guide, we'll explore the most common projector installation mistakes and provide expert tips on how to avoid them, ensuring a seamless and professional setup every time.
As an experienced content writer with over 20 years of expertise in creating SEO-friendly and engaging content, I understand the importance of delivering valuable information to readers while optimizing for search engines. Throughout this article, we'll cover a wide range of topics related to projector installation, including positioning, mounting, cabling, calibration, and more. We'll also discuss the role of AV system integration software in streamlining the installation process and minimizing errors.
By the end of this guide, you'll have a deep understanding of the most critical aspects of projector installation and be well-equipped to tackle your next project with confidence. Let's dive in and explore the world of projector installation, focusing on the key areas where mistakes often occur and how to avoid them for a flawless setup.
Understanding the Basics of Projector Installation
Before we delve into the common mistakes to avoid, it's essential to grasp the fundamental concepts of projector installation. This section will provide an overview of the key factors to consider when setting up a projector, laying the groundwork for a successful installation.
1. Projector Types and Their Unique Requirements
There are several types of projectors available on the market, each with its own set of features and installation requirements. The most common projector types include:
DLP (Digital Light Processing) projectors
LCD (Liquid Crystal Display) projectors
LCoS (Liquid Crystal on Silicon) projectors
Short-throw and ultra-short-throw projectors
Laser projectors
Understanding the specific characteristics and needs of your projector type is crucial for ensuring a proper installation. For example, DLP projectors require adequate ventilation to prevent overheating, while short-throw projectors need to be positioned closer to the screen to achieve the desired image size.
2. Room Layout and Projector Placement
The layout of the room where you plan to install your projector plays a significant role in determining the optimal projector placement. Factors to consider include:
Room dimensions (length, width, and height)
Screen size and aspect ratio
Seating arrangements
Ambient light sources (windows, doors, light fixtures)
Obstacles or obstructions (columns, beams, furniture)
By carefully assessing the room layout, you can identify the best location for your projector, ensuring a clear projection path and minimizing the impact of ambient light on image quality.
3. Mounting Options and Considerations
Projectors can be mounted in various ways, depending on the specific requirements of your installation. The most common mounting options include:
Ceiling mounts
Wall mounts
Tabletop or shelf placement
Rear projection setups
Each mounting option has its own advantages and challenges. For example, ceiling mounts provide a clean, professional look but require careful planning and installation to ensure proper alignment and stability. Wall mounts offer flexibility in positioning but may be subject to vibrations or movement. Tabletop placement is simple but may be prone to accidental bumps or obstructions.When choosing a mounting option, consider factors such as the projector's weight, the distance from the screen, the availability of power and signal connections, and the overall aesthetics of the room.
4. Cabling and Connectivity
Proper cabling and connectivity are essential for ensuring a reliable and high-quality projection. The most common types of cables used in projector installations include:
HDMI (High-Definition Multimedia Interface)
VGA (Video Graphics Array)
DVI (Digital Visual Interface)
DisplayPort
USB (Universal Serial Bus)
When planning your installation, consider the length and quality of the cables needed to connect your projector to the source devices (computers, DVD players, gaming consoles, etc.). Use high-quality, well-shielded cables to minimize signal degradation and interference. Also, ensure that the cables are properly managed and routed to avoid tripping hazards or visual clutter.
Common Projector Installation Mistakes and How to Avoid Them
Now that we've covered the basics of projector installation, let's explore the most common mistakes people make during the process and provide expert tips on how to avoid them.
1. Incorrect Projector Placement and Alignment
One of the most frequent errors in projector installation is incorrect placement and alignment. This can result in a distorted, uneven, or poorly focused image. To avoid this mistake:
Use the projector's lens shift, keystone correction, and zoom features to fine-tune the image alignment
Ensure the projector is level and perpendicular to the screen surface
Follow the manufacturer's recommended throw distance and offset specifications
Use a laser level or plumb bob to ensure accurate positioning
2. Inadequate Mounting Stability and Security
A poorly secured projector mount can lead to vibrations, movement, or even the projector falling, causing damage or injury. To prevent this:
Choose a mount rated for your projector's weight and size
Use appropriate hardware and anchors for the mounting surface (concrete, drywall, wood, etc.)
Tighten all bolts and screws securely, following the manufacturer's torque specifications
Regularly inspect the mount and projector for any signs of looseness or wear
3. Insufficient Ventilation and Cooling
Projectors generate significant heat during operation, and inadequate ventilation can lead to overheating, reduced performance, and shortened lamp life. To ensure proper cooling:
Maintain a minimum clearance around the projector's air intake and exhaust vents
Use air filters to prevent dust and debris from clogging the vents
Consider installing a projector enclosure with built-in cooling fans for harsh environments
Monitor the projector's temperature and shutdown automatically if it exceeds safe limits
4. Improper Cabling and Signal Integrity
Poor cable management and low-quality cables can result in signal degradation, interference, or intermittent connectivity issues. To maintain optimal signal integrity:
Use high-quality, well-shielded cables appropriate for the signal type and distance
Avoid running cables alongside power lines or other sources of electromagnetic interference
Use cable management solutions (conduits, raceways, ties) to organize and protect the cables
Test the signal quality and connectivity thoroughly before finalizing the installation
5. Neglecting Projector Calibration and Settings
Failing to properly calibrate your projector and adjust its settings can lead to suboptimal image quality, inaccurate colors, and reduced overall performance. To ensure the best possible projection:
Use a calibration tool or software to adjust the projector's brightness, contrast, color, and sharpness settings
Match the projector's color space and gamma settings to the source material and viewing environment
Adjust the projector's lens focus and zoom for maximum clarity and detail
Save and recall custom settings for different types of content or usage scenarios
6. Ignoring Ambient Light Control and Screen Selection
Ambient light can significantly impact the perceived image quality and contrast of your projection. To minimize the effects of unwanted light:
Use light-blocking shades, curtains, or blinds to control the amount of ambient light entering the room
Consider installing a projector screen with a high-gain or ambient light-rejecting surface
Position the screen away from direct light sources, such as windows or lamps
Adjust the projector's brightness and contrast settings to compensate for the ambient light levels
7. Overlooking Audio Integration and Acoustics
While the primary focus of projector installation is often on the visual aspects, neglecting audio integration and room acoustics can detract from the overall experience. To ensure immersive audio:
Choose speakers or a sound system appropriate for the room size and layout
Position speakers for optimal sound coverage and balance
Use acoustic treatments (panels, diffusers, bass traps) to control reflections and improve sound clarity
Calibrate the audio system using a sound level meter and equalization tools
8. Failing to Plan for Maintenance and Upgrades
Projectors require regular maintenance and may need upgrades over time to keep up with evolving technology and user needs. To future-proof your installation:
Develop a maintenance schedule for cleaning the projector lens, filters, and housing
Monitor the projector's lamp life and replace it proactively to avoid unexpected failures
Consider installing a power conditioner or surge protector to safeguard the projector from electrical issues
Plan for future upgrades by choosing a projector with expandable connectivity and firmware update capabilities
The Role of AV System Integration Software in Projector Installation
AV system integration software plays a crucial role in streamlining the projector installation process and minimizing errors. These tools provide a centralized platform for designing, configuring, and managing AV systems, including projectors, screens, audio devices, and control interfaces.
1. System Design and Visualization
AV system integration software allows installers to create detailed system designs and visualizations, helping to identify potential issues and optimize the installation layout. Key features include:
Drag-and-drop system design tools
3D room and equipment modeling
Cable and signal flow diagrams
Virtual reality (VR) and augmented reality (AR) design previews
By leveraging these design capabilities, installers can ensure that the projector and its associated components are properly positioned, connected, and configured for optimal performance.
2. Equipment Database and Compatibility Checking
AV system integration software often includes extensive databases of AV equipment specifications, allowing installers to quickly select and compare compatible components. This helps to avoid compatibility issues and ensures that the projector and its connected devices will work seamlessly together.
3. Configuration and Programming
Once the system design is finalized, AV system integration software enables installers to configure and program the projector and other devices using a unified interface. This includes:
Setting up projector parameters (resolution, aspect ratio, color space, etc.)
Configuring control systems and user interfaces
Programming automated functions (power on/off, input switching, etc.)
Integrating the projector with other AV devices and room control systems
By centralizing the configuration and programming process, AV system integration software reduces the risk of errors and inconsistencies, leading to a more reliable and user-friendly installation.
4. Documentation and Project Management
AV system integration software also provides tools for generating detailed documentation and managing installation projects. This includes:
Generating system schematics, wiring diagrams, and equipment lists
Creating user manuals and training materials
Tracking project timelines, budgets, and resource allocation
Collaborating with team members and stakeholders
By maintaining accurate and up-to-date documentation, installers can ensure that the projector installation is properly recorded and can be easily referenced for future maintenance, troubleshooting, or upgrades.
Real-World Case Studies: Learning from Successful Projector Installations
To further illustrate the importance of avoiding projector installation errors and highlight the benefits of proper installation techniques, let's explore some real-world case studies of successful projector installations.
Case Study 1: University Lecture Hall
A large university needed to upgrade the projector system in its main lecture hall, which seats over 500 students. The existing setup suffered from poor image quality, frequent technical issues, and difficulty in maintaining consistent performance across different types of content.
The installation team began by carefully assessing the room layout, lighting conditions, and usage requirements. They selected a high-brightness, laser-phosphor projector with a long-throw lens to ensure adequate image size and clarity from the back of the room. The projector was paired with a motorized, ambient light-rejecting screen to maintain optimal contrast and color accuracy in the well-lit space.
To simplify system control and minimize errors, the team integrated the projector with a centralized AV control system using AV system integration software. This allowed professors to easily select input sources, adjust volume levels, and control the room lighting from a single, user-friendly touch panel.The result was a reliable, high-performance projection system that enhanced the learning experience for students and reduced the burden on IT staff to manage and maintain the equipment.
Case Study 2: Corporate Boardroom
A global corporation wanted to install a state-of-the-art projector system in its executive boardroom to support high-stakes presentations, video conferencing, and collaborative meetings.
The installation team worked closely with the client to understand their specific needs and preferences, including the desired image size, resolution, and aspect ratio. They selected a 4K UHD laser projector with a wide color gamut and HDR support to deliver stunning visual quality and future-proof the installation.
To ensure optimal placement and alignment, the team used AV system integration software to create a detailed 3D model of the room and simulate the projector's throw distance and offset. They then installed the projector using a precision-engineered, vibration-damping ceiling mount to maintain a stable and consistent image.
The projector was integrated with a premium audio system, including ceiling-mounted speakers and a digital signal processor (DSP) for accurate sound reproduction and echo cancellation.
The entire system was controlled via a wireless touch panel, allowing presenters to seamlessly switch between sources and adjust settings without interrupting the flow of the meeting.
The end result was a highly impressive and intuitive projection system that elevated the client's boardroom presentations and remote collaboration capabilities.
Case Study 3: Immersive Museum Exhibit
A popular science museum was designing a new immersive exhibit showcasing the wonders of the universe. The centerpiece of the exhibit was to be a large, curved projection screen displaying high-resolution images and videos of planets, galaxies, and other celestial objects.
The installation team faced several challenges, including the unusual screen geometry, the need for edge blending and warping to create a seamless image, and the requirement to synchronize multiple projectors for maximum brightness and resolution.
To overcome these challenges, the team used AV system integration software to design and simulate the complex projection setup. They selected four high-performance DLP projectors with specialized lenses and mounted them in a precise alignment using custom-fabricated brackets.
The software allowed them to fine-tune the edge blending and warping parameters, ensuring a perfectly smooth and continuous image across the curved screen surface. The projectors were synchronized using a hardware-based frame lock system to eliminate any tearing or artifacts.
The resulting installation was a breathtaking and immersive display that transported visitors into the depths of space and sparked their imagination and curiosity.
These case studies demonstrate the importance of careful planning, selection of appropriate equipment, and the use of AV system integration software to ensure successful projector installations in a variety of settings.
Frequently Asked Questions about Projector Installation
To further assist readers in avoiding common projector installation errors, let's address some of the most frequently asked questions on the topic.
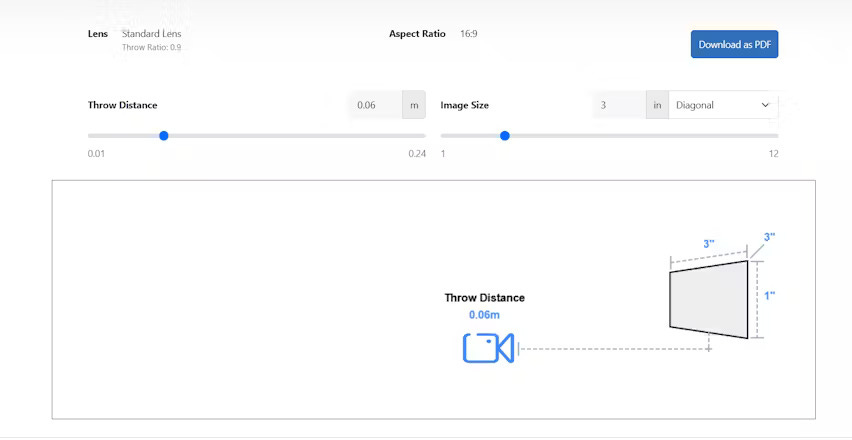
1. What is the optimal throw distance for my projector and screen size?
The optimal throw distance depends on your projector's lens specifications and the desired screen size. Most projector manufacturers provide throw distance calculators or tables to help determine the appropriate distance based on the projector model and lens type. As a general rule, the throw distance should be within the range specified by the manufacturer to ensure a clear and properly sized image.
2. How do I choose the right projector mount for my installation?
When selecting a projector mount, consider the following factors:
Projector weight and size: Ensure the mount is rated to support your projector's weight and dimensions.
Mounting surface: Choose a mount suitable for the surface you'll be attaching it to (e.g., concrete, drywall, wood).
Adjustability: Look for a mount with adequate adjustability for pitch, roll, and yaw to fine-tune the projector's alignment.
Cable management: Select a mount with built-in cable management features to keep your installation neat and tidy.
3. What type of screen should I use for my projector?
The type of screen you choose will depend on your specific needs and environment. Some common screen types include:
Matte white: A versatile, general-purpose screen suitable for most installations.
High-gain: Screens with a higher gain reflect more light back to the audience, resulting in a brighter image. These are ideal for rooms with ambient light or long throw distances.
Ambient light-rejecting (ALR): ALR screens are designed to maintain contrast and color accuracy in rooms with high ambient light levels.
Acoustically transparent: These screens allow sound to pass through, making them ideal for installations with speakers placed behind the screen.
4. How often should I replace my projector lamp?
Projector lamps typically last between 2,000 and 4,000 hours, depending on the model and usage conditions. It's essential to replace the lamp before it fails completely to avoid damage to the projector and ensure optimal image quality. Most projectors have a lamp life counter that tracks the number of hours the lamp has been in use. Plan to replace the lamp when it reaches the manufacturer's recommended lifespan or if you notice a significant decrease in brightness or image quality.
5. Can I use any type of cable for my projector installation?
While it may be tempting to use cheaper, generic cables for your projector installation, it's crucial to use high-quality, well-shielded cables designed for the specific signal type and distance. Using subpar cables can lead to signal degradation, interference, or even damage to your equipment. Always choose cables that are rated for the bandwidth and length required for your installation, and opt for reputable brands with proper shielding and construction.
6. How do I calibrate my projector for the best image quality?
To calibrate your projector for optimal image quality, follow these steps:
Set the projector to its factory default settings to start with a neutral baseline.
Adjust the projector's focus and zoom to ensure a sharp and properly sized image.
Use a calibration disc or software to display test patterns for brightness, contrast, color, and sharpness.
Adjust the projector's settings using the test patterns as a reference, starting with brightness and contrast, then moving on to color and sharpness.
Fine-tune the settings based on your specific content and viewing preferences.
Some high-end projectors come with built-in calibration tools or support professional calibration software for even more precise adjustments.
7. What should I do if my projector overheats or shuts down unexpectedly?
If your projector overheats or shuts down unexpectedly, take the following steps:
Turn off the projector immediately and disconnect it from the power source.
Allow the projector to cool down completely before attempting to restart it.
Check the air intake and exhaust vents for any blockages or dust accumulation, and clean them if necessary.
Ensure the projector is placed in a well-ventilated area with adequate clearance on all sides.
If the problem persists, contact the projector manufacturer or a professional AV technician for further assistance.
Regular maintenance, including cleaning the air filters and ensuring proper ventilation, can help prevent overheating issues and prolong the life of your projector.
Conclusion
Proper projector installation is essential for achieving optimal image quality, reliability, and user satisfaction. By understanding the common mistakes and following best practices, you can ensure a successful installation that meets the unique needs of your application.
Remember to carefully plan your installation, selecting the appropriate equipment, placement, and mounting options. Use high-quality cables and take steps to maintain signal integrity and minimize interference. Calibrate your projector and adjust its settings for the best possible image quality, and don't forget to consider ambient light control and acoustics for a truly immersive experience.
AV system integration software can be a powerful tool for streamlining the installation process, reducing errors, and ensuring compatibility between components. By leveraging these tools and staying up-to-date with the latest technologies and techniques, you can deliver outstanding projector installations that exceed client expectations.
As we've seen from the real-world case studies, successful projector installations can have a transformative impact on a wide range of settings, from classrooms and boardrooms to museums and beyond. By learning from these examples and adapting their lessons to your own projects, you can achieve similarly impressive results.
Finally, remember that projector installation is an ongoing process that requires regular maintenance, monitoring, and upgrades to ensure optimal performance over time.
By staying proactive and addressing potential issues before they become problems, you can maximize the value of your projector investment and deliver lasting satisfaction to your users.
In conclusion, by avoiding common mistakes, following best practices, and leveraging the power of AV system integration software, you can ensure successful projector installations that captivate audiences, enhance productivity, and leave a lasting impression. As an AV professional, your attention to detail and commitment to excellence in projector installation can make all the difference in creating truly outstanding visual experiences.