
How to Match Projector Screen Size to Your Room Dimensions
In this comprehensive guide, we'll dive into all the factors you need to consider when matching a projector screen to your room.

When setting up a home theater or presentation room, one of the most important considerations is selecting the right projector screen size for your room dimensions. The screen size relative to the room size and viewing distance has a huge impact on the viewing experience. Choose a screen that's too small and the image will lack impact. Go too big and viewers will need to constantly move their heads to take in the whole picture.
Getting the projector screen sizes dimensions right is key for an immersive experience. In this comprehensive guide, we'll dive into all the factors you need to consider when matching a projector screen to your room, including:
Room size and dimensions
Viewing distance and seating positions
Aspect ratio and resolution of your projector
Ambient lighting conditions
Projector throw distance
And more
By the end, you'll have a clear understanding of how to select the optimal screen size for your specific space and setup. Let's get started!
Why Projector Screen Size Matters
Before we get into the nitty gritty of calculating the right screen size, it's important to understand why this is such a crucial element of any projector setup.
Immersion and Impact The whole point of a projector is to create a big, impactful image. Whether you're watching a movie, gaming, or giving a presentation, a large screen size enhances the experience and helps the content come alive. It creates a more immersive "theater-like" feeling compared to a small TV screen.
Viewing Comfort On the flip side, an excessively large screen can be uncomfortable to view, especially if seats are positioned close to the screen. Viewers may need to move their heads or strain their eyes to see the whole image, which quickly becomes fatiguing.
Image Quality Projector screen size also affects perceived image quality. Select a screen that's too small for the room and you may notice visible pixels or a "screen door effect" when sitting close. A massive screen paired with a low resolution projector will look soft and blurry. Matching screen size, viewing distance and projector resolution is important for getting the sharpest, clearest image.
Practicality Of course, you also need to consider the practical limitations of your room. You may want a 150-inch screen but if your wall isn't big enough to accommodate it, you'll have to scale down. Factoring in room dimensions is key.As you can see, projector screen sizes dimensions have a big influence on the overall viewing experience. Taking the time to calculate the right screen size will pay off in the long run. You'll end up with a setup that looks great, is comfortable to view, and fits perfectly in your space.
Ideal Viewing Distance and Position
One of the primary factors in determining projector screen size is the viewing distance from the screen to the seating area. This ties into the concept of "field of view" - how much of your vision the screen takes up from a given distance.
THX Recommendations THX, a leader in cinema standards, provides some general guidelines for screen size based on viewing distance:
A 36 degree viewing angle is considered optimal. This means the screen width should be about 0.6 times the viewing distance.
The minimum viewing angle for an immersive experience is 26 degrees, where the screen width is around 0.4 times the distance.
The maximum recommended viewing angle is 52 degrees, with a screen width around 0.8 times the viewing distance. Any larger and you may need to move your head to see the whole screen.
For example, if your viewing distance is 10 feet (120 inches), THX recommends:
Minimum screen width: 0.4 x 120" = 48" (roughly 55" diagonal for 16:9)
Optimal screen width: 0.6 x 120" = 72" (roughly 82" diagonal)
Maximum screen width: 0.8 x 120" = 96" (roughly 110" diagonal)
SMPTE Guidelines The Society of Motion Picture & Television Engineers (SMPTE) also provides a general guideline. They recommend the viewing angle should be 30 degrees, which corresponds to a screen width around 0.5 times the viewing distance.
Using the same 10 foot viewing distance example, SMPTE would recommend:
Screen width: 0.5 x 120" = 60" (roughly 69" diagonal for 16:9)
Seating Position In a dedicated home theater, the main seating area should ideally be centered in the room, both vertically and horizontally in relation to the screen. However, most rooms have multiple rows of seating to accommodate more viewers.
When calculating your screen size, consider the viewing angles and distances from the different seating positions, not just the primary "money seat". You may need to compromise and find a screen size that offers an acceptable experience for all viewers.
For example, if your front row is 10 feet from the screen and your back row is 15 feet away, you might select a screen size that's a bit smaller than the THX maximum for the front row. This ensures the back row still has an immersive viewing angle without the front row feeling overwhelmed.
Viewing Height In addition to distance, the vertical viewing angle is important for comfort. Ideally, viewers should not have to look up more than 15 degrees to see the top of the screen, or down more than 15 degrees to see the bottom.When planning seating, aim to have viewers' eyes aligned with the center of the screen or slightly below. For a typical 16:9 screen, the bottom edge should be around 24-36 inches off the floor.
Room Size and Dimensions
The physical dimensions of your room will ultimately limit the maximum projector screen size you can accommodate. You'll need to consider not just the width of the wall, but also the height of the ceiling and distance from the screen wall to the seating area.
Width Measure the width of the wall where you plan to install the screen. Remember to account for the frame or border around the screen material. For a fixed frame screen, aim to leave at least 6-12 inches on either side of the screen. For a retractable screen, ensure you have enough space for the screen casing and extra "black drop" material above and below the viewing area.
Height Measure from the floor to the ceiling. For a fixed frame screen, you'll want to leave some space below the bottom edge of the screen - typically 24-36 inches depending on the viewing height discussed earlier. You'll also need to account for the screen's frame or border.
For example, if your ceiling height is 8 feet (96 inches) and you want the bottom edge 30 inches off the floor with a 3-inch frame, the maximum screen height would be:
96" - 30" - 3" - 3" = 60"
With a 16:9 aspect ratio, this corresponds to a maximum diagonal screen size of around 106 inches.
Depth Measure from the screen wall to the back wall or furthest seating position. This will help determine your maximum viewing distance and ensure you have enough space for comfortable seating. As a general guideline, aim for a minimum distance of 1.5 times the screen diagonal.
For example, if you're considering a 120-inch diagonal screen:
Minimum distance: 1.5 x 120" = 180" (15 feet)
If your room is only 12 feet deep, a 120-inch screen would be too large based on this guideline. You'd either need to select a smaller screen size or consider a different room layout.
Other Considerations In addition to the raw dimensions, consider other elements in the room that may affect screen size and placement:
Windows: Ambient light from windows can wash out a projected image. If you have windows, you may need to use blackout curtains or shades to control the light. Alternatively, consider a smaller screen size or a screen material with higher gain to maintain image brightness.
Doors: Ensure the screen won't block any doors or walkways when fully extended. For a retractable screen, check that the screen casing won't interfere with the door trim or opening.
Obstacles: Note any columns, furniture, or other obstacles that could block the projected image or viewing angles from certain seats. You may need to adjust the screen placement or size to accommodate these.
HVAC vents: Avoid placing the screen directly in front of an air vent, as the moving air could cause the screen material to ripple or sway.
By carefully measuring your room and considering all the physical elements, you can determine the maximum projector screen sizes dimensions that will fit comfortably in your space. This gives you a starting point to then factor in viewing distance, seating positions, and your projector's capabilities to zero in on the optimal screen size.
Projector Throw Distance and Lens
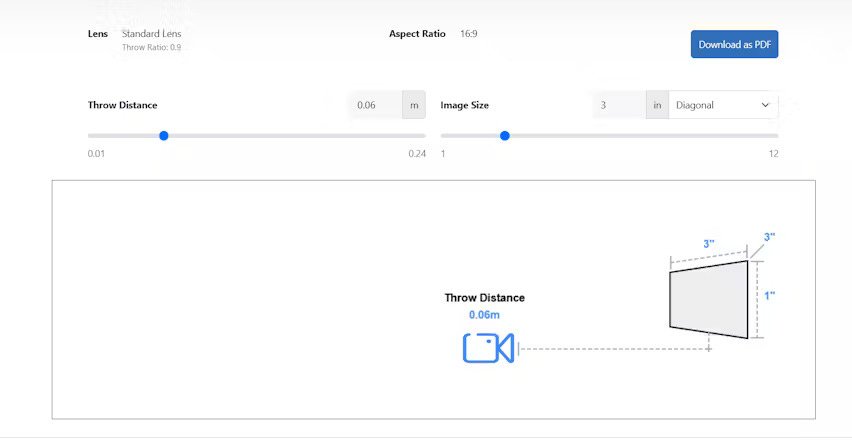
The next key factor in selecting a projector screen size is the throw distance of your projector. This is the distance from the projector's lens to the screen, and it determines how large of an image the projector can create from a given distance.
Throw Ratio Throw distance is typically expressed as a throw ratio - the ratio of the distance from the projector to the screen, relative to the width of the screen. For example, a throw ratio of 1.5:1 means the projector needs to be 1.5 times the screen width away from the screen.So for a 96-inch wide screen (110" diagonal at 16:9), a projector with a 1.5:1 throw ratio would need to be:
1.5 x 96" = 144" (12 feet) away
Projectors with a lower throw ratio can create a larger image from a shorter distance, while higher ratios need more distance for the same size screen.
Projector Placement The throw ratio also determines where you can place the projector in your room. Short throw projectors (with ratios under 1:1) can be placed closer to the screen, often on a table or credenza. This is ideal for smaller rooms or setups where you want the projector to be less visible.Standard throw projectors (with ratios from 1:1 to 3:1) need to be further back, typically ceiling mounted or on a high shelf. This is more common in dedicated home theaters with longer room depths.
Long throw projectors (with ratios over 3:1) are less common in home setups, as they require a significant distance from the screen. However, they may be necessary in very large rooms or commercial spaces.
Zoom and Lens Shift Many projectors have zoom and lens shift features that provide some flexibility in throw distance and placement:
Zoom allows you to adjust the size of the projected image without moving the projector. This is expressed as a zoom ratio, such as 1.2x or 2.0x. Higher zoom ratios give you more flexibility in throw distance.
Lens shift allows you to move the projected image up, down, left or right without physically moving the projector. This is useful if you can't place the projector perfectly centered in front of the screen due to room constraints.
However, keep in mind that using the extreme ends of the zoom or shift range can affect image quality. It's best to use these features to fine-tune your setup, not as a complete solution for awkward projector placement.
Calculating Screen Size To determine your ideal screen size based on throw distance:
Measure the distance from your planned projector location to the screen wall.
Look up your projector's throw ratio in the manual or specifications.
Divide the throw distance by the throw ratio to get the maximum screen width.
Convert that width to a diagonal screen size based on your desired aspect ratio.
For example, if your projector has a throw ratio of 1.5:1 and you plan to mount it 15 feet (180 inches) from the screen:
Maximum screen width: 180" / 1.5 = 120"
For a 16:9 screen, this corresponds to a diagonal size of about 138"
Alternatively, you can use a projection calculator like the one on projectorcentral.com to plug in your projector model, desired screen size, and room dimensions. This will show you the throw distances needed and help you find the optimal setup for your space.
Ambient Light and Screen Gain
The amount of ambient light in your room can have a big impact on the perceived image quality and appropriate projector screen size. Too much light will wash out the image, reducing contrast and making colors look muted. This is especially problematic with larger screen sizes, as the projected light is spread out over a greater area.
Controlling Light Ideally, a projection setup should be in a room with minimal ambient light. This means no windows or skylights, or using blackout curtains and shades to block any outside light. You should also be able to control the room's lighting, either dimming or turning off overhead lights and lamps.If you can't completely control the light, you'll need to take some extra steps to maintain image quality:
Use a higher gain screen material. Gain refers to how well the screen reflects light back towards the viewer. A screen with a gain of 1.0 will reflect light evenly in all directions. Higher gain screens, such as 1.3 or 1.5 gain, will reflect more light back towards the center of the room, making the image appear brighter.
Choose a darker screen material color. White screens offer the most accurate color reproduction, but gray or black screens can help improve perceived contrast in rooms with ambient light. The darker color helps absorb some of the excess light, making blacks appear deeper.
Consider an ambient light rejecting (ALR) screen. ALR screens are designed to reflect projector light back towards the viewer while absorbing light from other angles. This helps maintain contrast and color saturation even in moderately lit rooms.
Select a smaller screen size. A smaller screen will have a higher pixel density and perceived brightness compared to a large screen with the same projector.
Screen Gain and Viewing Angle While high gain screens can help combat ambient light, they also have a narrower optimal viewing angle. This means the image will look best when viewed from directly in front of the screen, with brightness and color accuracy falling off as you move to the sides.
For example, a 1.0 gain screen may have a viewing angle of 180 degrees, meaning the image will look consistent from any seat in the room. A 2.0 gain screen may have a viewing angle of only 60 degrees, so viewers sitting off to the sides will see a dimmer, less accurate image.When selecting a screen gain, consider your room layout and seating positions. If you have a wide seating area with viewers far off to the sides, a lower gain screen will offer a more consistent experience for everyone. If your seating is more centered or you need to prioritize brightness over wide viewing angles, a higher gain screen may be appropriate.
Projector Lumens and Screen Size The brightness of your projector, measured in lumens, also affects how well it can handle ambient light and larger screen sizes. A brighter projector will be able to maintain better image quality on a large screen or in a room with some light.
As a general guideline, aim for at least 1,000 lumens for a 100-inch screen in a dark room. For a 150-inch screen or a room with some ambient light, look for a projector with at least 2,500 lumens. Keep in mind that manufacturer lumen ratings are often overstated, so look for independent reviews and measurements when comparing projectors.
You can also calculate the brightness you need based on your screen size and gain using the following formula:
Required lumens = (screen area in square feet) x (foot-lamberts) / (screen gain)
Foot-lamberts (fL) is a measure of brightness, with 16fL considered the ideal for a dark room and 40fL for a room with some ambient light.
For example, for a 120-inch diagonal 1.0 gain screen in a dark room:
Screen area: (120" x 0.87) x (120" x 0.49) = 61.5 square feet
Required lumens: 61.5 x 16 / 1.0 = 984
So a projector with at least 1,000 lumens would be appropriate for this setup. For the same screen in a room with some ambient light:
Required lumens: 61.5 x 40 / 1.0 = 2,460
In this case, a projector with at least 2,500 lumens would be recommended to maintain image brightness and quality.
Aspect Ratio and Resolution
The aspect ratio and resolution of your projector and content will also influence your ideal projector screen sizes dimensions. Aspect ratio refers to the proportional relationship between the width and height of the image, while resolution refers to the number of pixels that make up the image.
Common Aspect Ratios
16:9 (1.78:1) - This is the standard aspect ratio for HDTV and most modern video content. It's also the native aspect ratio for most home theater projectors.
16:10 (1.6:1) - This is a common aspect ratio for computer monitors and some projectors. It's slightly taller than 16:9.
4:3 (1.33:1) - This is the standard aspect ratio for older TV content and some computer monitors. It's more square than 16:9.
2.39:1 (Cinemascope) - This is a wider aspect ratio used for many movies. It provides a more immersive, cinematic experience but requires a special anamorphic lens or projector scaling to display properly.
When selecting a screen, you'll want to choose an aspect ratio that matches your projector and the majority of your viewing content. For most home setups, a 16:9 screen is the best choice. If you watch a lot of older 4:3 content, you may want to consider a 16:10 screen, which can display both 16:9 and 4:3 content with minimal letterboxing (black bars).If you have a projector with an anamorphic lens and plan to watch a lot of 2.35:1 movies, you may want a 2.35:1 screen. This will allow you to display the full movie image without letterboxing, but 16:9 content will have pillarboxing (black bars on the sides).
Projector Resolution The resolution of your projector will also affect how large of a screen you can use while still maintaining good image quality. A higher resolution projector can display more detail on a larger screen without the image appearing soft or pixelated.Common projector resolutions include:
720p (1280x720 pixels) - This is considered "HD" resolution and is sufficient for most content up to a 100-inch screen.
1080p (1920x1080 pixels) - This is "Full HD" resolution and provides a noticeable improvement in detail and clarity over 720p. It's ideal for screens up to 150 inches.
4K (3840x2160 pixels) - This is "Ultra HD" resolution and offers four times the detail of 1080p. It can maintain excellent image quality on very large screens over 150 inches.
When selecting a screen size, consider the resolution of your projector and your viewing distance. If you have a lower resolution projector (720p or 1080p) and sit very close to the screen, you may notice individual pixels or a "screen door effect" on a very large screen. In this case, it's better to choose a smaller screen size or upgrade to a higher resolution projector.As a general guideline, aim for a screen diagonal that's no more than 1.5 times the projector's native resolution in pixels. So for a 1080p projector (1920 pixels wide), the maximum recommended screen diagonal would be:
1920 pixels x 1.5 = 2880 pixels
2880 pixels / 1920 pixels/inch = 150 inches
For a 4K projector (3840 pixels wide), the maximum screen diagonal would be:
3840 pixels x 1.5 = 5760 pixels
5760 pixels / 1920 pixels/inch = 300 inches
Of course, these are just guidelines and your individual preferences may vary. Some viewers are more sensitive to image quality and may prefer a smaller screen size, while others prioritize immersion and are willing to sacrifice some detail for a larger image.
Matching Aspect Ratio and Resolution When selecting a screen, it's important to match the aspect ratio to your projector's native resolution to avoid scaling or letterboxing. For example, if you have a 16:9 projector with a 1080p resolution, choose a 16:9 screen with a diagonal size appropriate for that resolution (up to 150 inches as per the guideline above).If you choose a screen with a different aspect ratio than your projector, you'll end up with black bars on the top/bottom or sides of the image.
For example, if you use a 2.35:1 screen with a 16:9 projector, 16:9 content will have black bars on the left and right (pillarboxing).Similarly, if you choose a screen that's much larger than your projector's native resolution can support, the image may appear soft or pixelated, especially when viewing from close distances.By matching your screen's aspect ratio and size to your projector's capabilities and your room layout, you'll ensure the best possible image quality and viewing experience.
Projector Screen Material
The material of your projector screen can also have an impact on image quality and the optimal projector screen sizes dimensions for your room. There are several types of screen materials available, each with their own characteristics and benefits.
Matte White Matte white is the most common and versatile screen material. It provides a smooth, uniform surface that reflects light evenly in all directions. This results in a wide viewing angle, making it a good choice for rooms with seating spread out to the sides.Matte white screens typically have a gain of 1.0 to 1.3, which means they reflect light at an equal or slightly boosted intensity compared to a reference standard. This provides good brightness and contrast in a controlled light environment.One downside of matte white screens is that they don't reject ambient light very well. If you have a room with windows or light fixtures that can't be fully controlled, a matte white screen may appear washed out.
High Contrast Gray High contrast gray screens are designed to boost contrast and black levels in rooms with some ambient light. They have a darker, gray surface that absorbs some of the projector's light output, making blacks appear deeper and more saturated.Gray screens typically have a gain of 0.8 to 1.1, which means they reflect less overall light than a matte white screen. This can help improve perceived contrast, but may require a brighter projector or smaller screen size to maintain adequate brightness.Like matte white screens, gray screens have a wide viewing angle and don't reject ambient light from the sides. They're best suited for rooms with some light control, but not a completely dark environment.
Ambient Light Rejecting (ALR) ALR screens are designed to reject ambient light from the sides and above, while still reflecting the projector's light back towards the viewer. This allows them to maintain better contrast and color saturation in rooms with less than ideal light control.ALR screens use a variety of techniques to achieve this effect, such as:
Angular reflective particles that only reflect light coming from the projector's direction
Micro-ridges or lenticular surfaces that absorb light from above and below
Multi-layer materials that filter out light from certain angles
The downside of ALR screens is that they typically have a narrower viewing angle compared to matte white or gray screens. If you have seating far off to the sides, viewers may experience a dimmer or less accurate image.ALR screens are also more expensive than traditional materials, and may require careful projector placement to work effectively. They're best suited for rooms with moderate ambient light that can't be fully controlled.
Rear Projection Rear projection screens are designed to be used with a projector placed behind the screen, rather than in front. The screen material is translucent, allowing the projected image to pass through and be viewed from the opposite side.Rear projection screens offer several benefits:
The projector is hidden from view, creating a cleaner look in the room
Viewers can walk in front of the screen without casting shadows on the image
Ambient light from the viewer's side is less likely to wash out the image
However, rear projection setups require more space behind the screen to accommodate the projector's throw distance. They also typically have a softer, less contrasty image compared to front projection.Rear projection screens are available in a variety of materials, including matte white, gray, and ALR. The same general principles of gain and viewing angle apply, but the specific characteristics will vary depending on the material and projector setup.When selecting a screen material, consider your room's lighting conditions, seating layout, and projector capabilities. A matte white screen is a good all-around choice for most setups, while a gray or ALR screen may be better for rooms with ambient light challenges. Rear projection is a specialized option that requires careful planning and projector selection.
Acoustically Transparent Screens
If you plan to use in-wall or behind-screen speakers in your projection setup, you may want to consider an acoustically transparent (AT) screen. AT screens use a perforated or woven material that allows sound to pass through with minimal attenuation or coloration.
Benefits of AT Screens
Allows for optimal speaker placement behind the screen, creating a more immersive audio experience
Hides speakers from view, providing a cleaner look in the room
Eliminates the need for external speaker stands or mounts, saving space
Drawbacks of AT Screens
More expensive than non-AT screens of similar size and material
May require more careful projector placement to avoid visible moiré patterns or texture
Slightly less gain and contrast compared to non-perforated materials
When selecting an AT screen, look for materials with a fine, uniform perforation pattern or weave. Larger holes or gaps can be visible from normal viewing distances and may create a distracting texture on the image.
You'll also want to consider the acoustic properties of the material, such as its attenuation and frequency response. Look for screens that have minimal impact on the sound passing through, with a flat frequency response across the audible spectrum. Finally, consider the size and placement of your speakers relative to the screen.
Most AT screens have a minimum recommended distance between the speakers and the screen material to avoid visible vibrations or distortion. This may require a slightly larger screen size or deeper wall cavity to accommodate.If you're using external speakers or don't require optimal speaker placement, a non-AT screen will provide better image quality and value for the price. But if audio is a priority and you want the cleanest, most immersive setup possible, an AT screen is worth considering.
Fixed vs. Retractable Screens
Another important consideration when selecting a projector screen is whether to choose a fixed frame or retractable design. Each has its own benefits and drawbacks depending on your room and usage needs.
Fixed Frame Screens Fixed frame screens use a rigid, non-retractable frame that's permanently mounted to the wall or ceiling. The screen material is stretched tightly over the frame, providing a flat, uniform surface for projection.Benefits of fixed frame screens:
Provide the flattest, most uniform screen surface for optimal image quality
No visible waves, wrinkles, or curling of the material over time
Thinner profile than retractable screens, sitting closer to the wall
More affordable than retractable screens of similar size and material
Easy to install and maintain, with no moving parts or motors
Drawbacks of fixed frame screens:
Always visible in the room, which may not be desirable for multi-purpose spaces
Require a dedicated wall or ceiling space for mounting
Limited to a single aspect ratio and size
May be more difficult to transport or relocate compared to retractable screens
Fixed frame screens are ideal for dedicated home theater rooms where the screen will be the main focal point. They provide the best possible image quality and value for the price, and can be easily customized with masking panels or other accessories.
Retractable Screens Retractable screens, also known as motorized or pull-down screens, use a rolling mechanism to store the screen material when not in use. The screen is typically mounted in a housing on the wall or ceiling, and can be lowered or raised as needed using a remote control or wall switch.Benefits of retractable screens:
Can be hidden away when not in use, freeing up wall space for other purposes
Allow for a larger screen size in rooms with limited wall space
Can be used with multiple aspect ratios or projection setups
Easier to transport or relocate compared to fixed frame screens
Provide a cleaner, more streamlined look in multi-purpose rooms
Drawbacks of retractable screens:
More expensive than fixed frame screens of similar size and material
Require careful installation and alignment to ensure a flat, uniform surface
May develop waves, wrinkles, or curling over time due to the rolling mechanism
Require periodic maintenance and adjustment of the motor and tensioning system
May have a visible housing or case when the screen is retracted
Slower to deploy and retract compared to fixed frame screens
Retractable screens are a good choice for multi-purpose rooms where the screen needs to be hidden away when not in use. They're also a good option for very large screen sizes that would be impractical or impossible to achieve with a fixed frame.When selecting a retractable screen, look for models with a sturdy, well-designed housing and a quiet, reliable motor. Consider the speed and noise level of the retraction mechanism, as well as the ease of adjusting the screen tension and alignment.Also consider the "drop" of the screen - the distance between the bottom of the housing and the top of the viewing area. Some retractable screens have a larger drop to accommodate higher ceiling mounts or to lower the screen to a comfortable viewing height.Ultimately, the choice between a fixed frame and retractable screen will depend on your specific room layout, usage needs, and budget. Consider the pros and cons of each type carefully, and don't be afraid to invest in a high-quality screen that will provide the best possible viewing experience for your setup.
Conclusion
Choosing the right projector screen sizes dimensions is a critical step in building a high-quality home theater or media room setup. By considering factors like room size, viewing distance, ambient light, and projector capabilities, you can select a screen that provides the best possible image quality and immersion for your space.Some key takeaways to keep in mind:
Aim for a screen size that provides a comfortable, immersive viewing experience based on your seating distance and room layout. A viewing angle of around 30-40 degrees is a good target for most setups.
Consider the throw distance and zoom range of your projector when selecting a screen size. Make sure your projector can fill the screen from your desired mounting position without sacrificing image quality.
Control ambient light as much as possible in your projection room. Use dark, non-reflective materials on the walls and ceiling, and consider blackout curtains or shades for any windows.
Select a screen material that matches your room's lighting conditions and viewing angles. Matte white is a good all-around choice, while ALR or gray screens may be better for rooms with ambient light challenges.
Consider the acoustics of your room and whether an acoustically transparent screen would benefit your speaker placement and sound quality.
Decide between a fixed frame or retractable screen based on your room's usage and layout needs. Fixed frame screens offer the best image quality and value, while retractable screens provide more flexibility and space savings.
By following these guidelines and carefully evaluating your specific needs and preferences, you can select a projector screen that will provide years of enjoyment and immersion in your home theater or media room. Don't be afraid to invest in a high-quality screen that matches your projector's capabilities and your room's potential - it will pay dividends in the long run.